Friday, 28 July 2017

Sew Over it - Silk Cami part 2

 Hello my lovelies, I do hope you've all had a good week. Its been a mix for me this week, hindered with a sore neck/shoulder, coldsore and headaches. Still trying to be really productive though to push through it. 


I just wanted to pop by to show you some photos that I've taken wearing the Sew Over It - Silk Cami that I made. I really love it and think that it goes great with a pair of jeans and a jacket. 


I mentioned in my last post that I made another one, as soon as I saw this material over on Sewisfaction's website I had to get some. Its a cotton poplin and the bee print is gorgeous. 

If you're thinking, I wish I could make my own clothes, do it!!!! Go on give it a try, honestly if you can sew at a basic level, you'll be fine. I always say sewing is easy to learn you just have to have the confidence to give it a go!!


I don't think these will be the last cami's that I make, I can see them being a staple in my wardrobe for sure. I did however prefer the drape of the crepe back satin for this style of top rather than the poplin. But I just couldn't resist the bees :D

Next on the list of makes, Sew Over It - Poppy Play Suit,

have a super weekend.....

Emma xxx

Sunday, 23 July 2017

Sew over it - Silk Cami

Hello my lovelies, I'm so sorry for the break in posts, I've been feeling unwell for the last week or so. I had planned in 3 posts over the last 2 weeks but non of them materialised. Believe it or not I've felt really run down, I think a lot of it is psychological but it has brought out my famous cold-sores. Great!! Urrrgghhh!! 

Anyway onto something more fun than that...I've managed to complete another of my Make 9 items, well I actually made this a couple of weeks ago and have since made another. But here is my journey.


I've seen quite a few people on Instagram making the Sew over it, Silk cami, so I thought I'd give it a go too. I love the retro images on the pattern packet. Its the type of top I love to throw on with a pair of trousers or jeans and pair with a cardi.


I had bought this beautiful panel of Italian designed, silk backed crepe a while before I bought the pattern. So I was living in hope that I would be able to squeeze a top out of it. I managed to cut the main front and back pieces out of it but had to cut the facings out of some plain white crepe. But to be honest that was better, otherwise you would have seen the pattern of the fabric on the facings through the outer garment which I didn't like.


The pattern is really simple, a front piece, a back piece, front facing and back facing. I always like to use a high lighter to mark out the size I want to cut out and because this was my first attempt I decided to trace off the pattern rather than cut it. I made the 12 based on the finished garment sizes due to my bust lol, I didn't want the 10 to be crushing them.


It was a little nerve wracking cutting out the beautiful fabric, it was a little slippery so I decided it would help if I pinned it to the carpet first, that worked a treat.


I cut it so that the blue panel on the fabric was at the bottom of the top, obviously lining up the grain line correctly too. It didn't take too long to sew together, the pattern calls for french seams at the sides. I haven't sewn a french seam since I was at college and had honestly forgotten how beautiful they are once finished. I had a little trouble with the hem stretching out slightly but this was corrected with a little bit of steam pressing. 


And here it is all finished, I must show you a photo of it on it looks gorgeous with jeans and a dress jacket. I actually wore it out on Friday night when we went out for dinner with my Dad.


It wouldn't finished off properly if it didn't have one of my labels sewn inside now would it. 

I can happily tick that one off my list now, already planning my next make :D

thanks for reading....

Emma xxx

Friday, 7 July 2017

***FABRIC DE-STASH*** MUST GO!!!!

Hello my lovelies, another post on a Friday?!?! Well I just had to come and tell you (if you didnt already know) that I am trying to de-stash all of my cotton fabrics that I have accumulated in the time I made bags.

I really need to get rid of it all to make room for my dressmaking fabrics, I just don't have the room to store it all and it makes more sense that it would go to someone who would make something beautiful out of it. 

If you are interested in any of them, please leave a comment on this post of which numbers you would like and your email address (if you are comfortable posting it here, if not email me : emma@bagladee.com) and I will work out postage for you.

Sizes and prices (extremely low) will be in the text below the photo. Any questions please just shout up....help me make room! If you could let your other crafty friends know I'd really appreciate it.


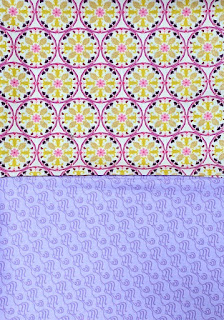
Top Fabric - No.1 : £2.50 
Dimentions: 58cm x 110cm

Bottom Fabric - No.2 : £3.50
Dimentions : 180cm x 110cm


Top Fabric - No.3 : £3.00 
Dimentions: 100cm x 110cm

**SOLD** Bottom Fabric - No.4 : £2.50
Dimentions : 55cm x 110cm


Top Fabric - No.5 : £3.00 
Dimentions: 90cm x 110cm

Bottom Fabric - No.6 : £2.50
Dimentions : 56cm x 110cm


**SOLD** Top Fabric - No.7 : £2.00
Dimentions: 90cm x 62cm

Bottom Fabric - No.8 : £2.00
Dimentions : 57cm x 80cm


Fabric No.9 : £2.00
Dimentions: 40cm x 110cm


Fabric No.10 : £2.75
Dimentions: 70cm x 110cm


Top Fabric - No.11 : £2.50
Dimentions: 49cm x 110cm

Bottom Fabric - No.12 : £2.75
Dimentions : 65cm x 108cm


Top Fabric - No.13 : £2.50
Dimentions: 46cm x 110cm

Bottom Fabric - No.14: £2.50
Dimentions : 52cm x 110cm


Top Fabric - No.15 : £3.00
Dimentions: 92cm x 110cm

Bottom Fabric - No.16 : £2.75
Dimentions : 60cm x 110cm


Fabric No.17: £1.00
Dimentions: 45cm x 53cm


Top Fabric - No.18 : £1.00
Dimentions: 45cm x 45cm

**SOLD** Bottom Fabric - No.19 : 75p
Dimentions: 65cm x 20cm 


Fabric No.20 : £1.00
Dimentions: 47cm x 53cm 


**SOLD** Top Fabric - No.21 : £2.00
Dimentions: 92cm x 45cm

Bottom Fabric - No.22 : £3.00
Dimentions: 87cm x 94cm


Top Fabric - No.23 : £1.50
Dimentions: 60cm x 48cm

Bottom Fabric - No.24 : 75p
Dimentions: 24cm x 70cm 


Top Fabric  - No.25 : £1.50
Dimentions: 33cm x 90cm

** SOLD** Bottom Fabric - No.26 : £2.00
Dimentions: 90cm x 52cm


**SOLD** Top Fabric - No.27 : £1.00
Dimentions: 27cm x 89cm

Bottom Fabric - No.28 : £2.00
Dimentions: 90cm x 53cm 


Fabric No.29 : £2.00
Dimentions: 36cm x 110cm


Fabric No.30 : £3.00
Dimentions : 106cm x 110cm


Fabric No. 31 : 3.00 
Dimentions: 100cm x 83cm


**SOLD** Fabric No.32 : £1.00 
Dimentions: 44cm x 59cm


Fabric No.33 : £2.75 
Dimentions: 60cm x 108cm


Fabric No.34 : £3.00
Dimensions : 130cm x 110cm


Fabric No.35 : £3.00 
Dimentions: 100cm x 110cm


Fabric No.36 : £2.00 
Dimentions: 37cm x 110cm


Fabric No.37 : £2.75 
Dimentions: 69cm x 82cm


Fabric No.38 : £1.00
Dimentions : 50cm x 44cm


**SOLD** Fabric No.39 : £2.00
Dimentions: 72cm x 52cm


**SOLD** Fabric No.40 : £1.50
Dimentions: 45cm x 82cm


**SOLD** Fabric No.41 : £2.50
Dimentions : 47cm x 110cm


Fabric No.42 : £2.00 
Dimentions: 40cm x 110cm

If you managed to make it to the end of my post thank you :D

Please, please, please help me de-stash....

Emma xxx

PJ shorts

Hello my lovelies, wow I cant believe another week has passed already. Well they do say that time flies when you're having fun don't they! 

To say that I am having fun is a huge understatement. Is it silly to say that I think I was put on this earth to sew? I know it sounds totally ridiculous, but when I am sewing and making things I am totally and utterly contented. Its a very long time since I have felt like this. and I am trying everything in my power to be able to work it so that I can find a job that I can do that will give me the freedom to focus on sewing. Mission impossible!! I choose to accept the mission :D


I have so many things to show and tell you, but I'm going to start with a shorts version of the PJ bottoms that I made. I had quite a lot of the fabric left so I thought it would make sense to make a shorts version. Looking back now I should have gone with my gut instinct and amended the PJ pattern to make a shorts version. Now let me explain what I did do....


I downloaded a free pattern from Craftsy, I cut out a medium as that is what the measurements said I should cut. But when they were sewn together they were absolutely massive and I mean ridiculously!!! You could have gotten myself and my other half in them :D

I ended up unpicking them, re-cutting them as an extra small (which I have to add I am not lol) adding a facing to the waistband and re-sewing the whole lot back together. It should have only taken me about an hour to make these but I think it ended up being about 3 hours in total. They are really simple to make (when you have a pattern that bloody fits) and don't take much fabric. I spent most of the time faffing around with the pattern rather than sewing but I suppose I learned some valuable lessons, including adapting a pattern to my measurements.

They fit perfectly and I love them.

Next on the list to show you.....the 'Sew over it' - Silk Cami

Emma xxx