
***this give away is now closed***
 38 days until Christmas, not that far away now is it!
I have been having so much fun lately finding my feet with the extra time I have for bagladee stuff that I thought I would write a couple of really easy and fun tutorials to get us all in the festive mood. (Listening to Christmas songs while making them is compulsory)
 Here is your template, make them as big or as small as you like, you could even make a variety of sizes.
 Materials you will need:
Template
Felt
Scissors
Scissors
Needle
 Using your template draw your star shapes onto your chosen felt you will need two stars for each decoration. I used fabric markers which disappear after 24 hours but you could use whatever pen/chalk you like.
 Carefully cut out each star.
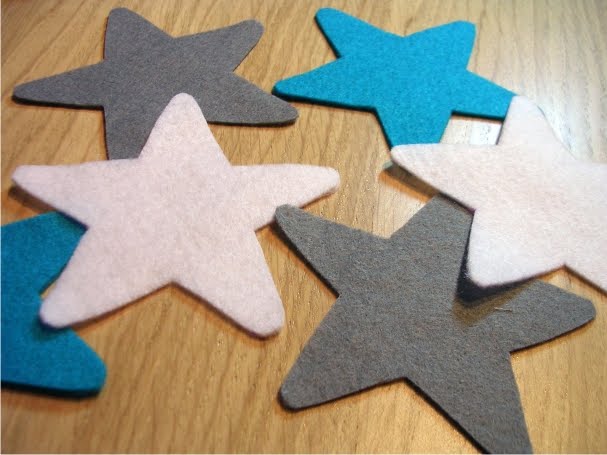 Now you have all your stars cut out, pair them up in two's. Take your chosen colour thread and double thread your needle. This will make the stitching detail stand out rather than single threaded.
 Starting at the bottom inverted point of your star stitch a running stitch all the way up to the top point.
 When you get to the top of the point turn your star over so you can see the back.
 And as you just slightly catch the felt feed the needle back down to the middle of the star, making sure that the thread is not visible on the front as you don't want to spoil that lovely stitching you have just done :)
 Once you have reached the middle make your way back out to one of the inverted points to start your next line.
 And as before stitch a running stitch line to the top of the point. When you have completed all the lines finish in the middle and tie off your thread.
 You will be left with two stars with lovely stitching detail. I like to put a pin at the top of each star so I know which way up they go when you sew them together.
 Cut your ribbon to 18cm (or whatever length you'd like) and fold it in half placing the ends together, pattern sides facing up and stitch in place.
 Stitch the ribbon loop to the back of the top point of one of your stars.
 Now with the good sides (lovely stitching) facing out pin together.
 Now using your thread but single threaded this time stitch all round the outside of the star again using a running stitch, make sure its quite close to the edge so that you create a cavity inside for stuffing.
 It will look something like this.....stop when you get to the last point of your star.
 Take a tiny bit of stuffing and poke gently into each of the points, stuff the centre generously. Stitch the last point and add stuffing to it, you can now add a little to the top point and hold in place as you continue to the top of the star where you started and tie off your thread.
 You will now have a little star that looks like this......
 You can add what ever detail you like you could cover the star in glitter or add a little rhinestone like I have. If you'd rather not stitch the lines onto the stars you could stick sequins or buttons on as embellishment. You could even add a smaller star in the middle out of jazzy Christmas fabric.
 The links in this post are for my favouritest shop in the whole wide world and you will find all you need @ paper-and-string to make these decorations.
***GIVEAWAY***
If you would like to win the set I made for this tutorial, simply comment on this post. Please make sure I have a way of contacting you from your comment.
A winner will be drawn on Saturday 20th November.
lovely tutorial, I like lots of photos, makes it easy to follow :o)
ReplyDeleteLove them Emma!! There are so many lovely ways you could decorate these, and they're so simple to follow!!
ReplyDeleteGlad to hear your really enjoying your extra crafting time!
Great tute!!!
Sharon
Hi Emma
ReplyDeleteThese are so cute!
Thanks for the tutorial
Gill
Thanks for this, I'm definitely going to make some.xx
ReplyDeleteHi!!
ReplyDeleteThanks for the tutorial.
I would like to win the set!
ludamiano@yahoo.com.br
These stars are so cute :-D
ReplyDeleteFingers crossed for the giveaway.
Thanks
ilcuoredibetty(at)libero(dot)it
Fab tutorial! I got plenty of stuffing and thread, just got to get me some felt and try this out.
ReplyDeleteWould love to have some homemade decorations in my house for Christmas
These Christmas stars are lovely. I need to make a whole tree full of them now. I can just imagine how neat it would look! Joy
ReplyDeleteI love your stars and your tutorial!!! Thanks!!!
ReplyDeleteI love Paper & String too!!! =^__^=
I cross my fingers!!!
manu@artecuore.it
Lovely site - thanks for sharing! I have come across from paper and string. I have my felt out already to start in the morning - but yours would still look nicer!!!
ReplyDeleteThanks for the chance. . . .
Juliexoxo
joycers86(at)hotmail(dot)com
linked to here from Sarah's blog.. loving it already!! would love the tutorial set too!
ReplyDeletei never made something of felt and maybe one day I will.
ReplyDeleteBut till then, I would like to enjoy your stars ;)
Wow, these are great! Thanks for the pattern I'll be making a couple.
ReplyDeleteHow lovely they are - such beautiful colours! Thank you. KJx
ReplyDeleteWoww.
ReplyDeleteIt's soo wonderful.
I like it!
Thank you for this tutorial!! It seems very easy to do adn they are wonderful!! :)
ReplyDeleteYhank you very much for this tutorial :D
ReplyDeletewhat a lovely and generous tutorial!
ReplyDeleteI;d love a chance to win the beautiful set!
myearthlyjewels(at)blogspot(dot)com
I love those stars! Thanks for the chance to win.
ReplyDeletethanks for the clear photos and the lovey, simple decorating idea. count me in on the giveaway opportunity! zimmiechan@yahoo.com
ReplyDeleteThese look great, I shall have to try and make them! Thanks for the tutorial! x
ReplyDeleteWhat a great tutorial, thanks for sharing it with us!
ReplyDeleteHope I can win some! ;)
sandra0silverio@gmail.com
Hi, came across this via the lovely Paper and String. Can't wait to have a go myself. Thanks for the chance of winning.
ReplyDeletesaraoshea2@yahoo.co.uk
I also landed here from Paper and String's blog, and pleased I did. As a newbie I'm loving seeing new tutorials - thanks for sharing.
ReplyDeleteFab tute missus! I can imagine a whole garland of felt stars in rainbow colours - pretty!
ReplyDeleteR xxx
lovely stars and easy tutorial, you could use christmas fabric as well to make them.
ReplyDeleteJosie x
Thank you very much for the lovely stars, and great instuctions.
ReplyDeleteSue
ohh likey likey, thanks for that fab tutorial.
ReplyDeleteThanks for the Tute! They are gorgeous - I will defo be making some for my tree!
ReplyDeleteThank you for this lovely Tutorial, I love things felt, especially Christmas stuff.
ReplyDeleteI must have missed this tutorial under all the blog posts I *aherm* heaven't -yet- gotten around to reading - ooops. Wow, these are great - thank you for sharing the tutorial. Hugs xx
ReplyDelete