Anyway to the happy bit.....I used the good old names in a hat system for drawing a winner. And that person is ::
Thank you all for taking part and reading my tutorial. I was planning another on Thursday but I will see how I'm feeling.
See you soon.

 Very jolly Santa's, complete with pom pom hats.
 Some very sweet gingerbread men, I adore these.
 Some festive trees.
 Some very handsome snowmen.
 And last but not least some very heavenly angels.
 I cant tell you how much fun I had making these....I don't think I'll be venturing into the world of felt characters as I know there are much more experienced peeps out there who already cover this and besides my true love lies with gorgeous colourful fabric so make sure you make the most of these cuties as once they are gone they are gone :D
 Template
 Materials you will need:
 For this tutorial its probably best if you pin your template pieces to the felt as they are quite long and tricky to keep straight.
 Draw round your templates, for each bow you will need:
 Cut all the pieces out with your scissors, you should now have 4 pieces that look like this.
 Take the large main section of the bow and lie it flat on a table (flat surface).
 Take both of the ends and fold inwards.
 Like so.....
 Pin either side of the join so that it stays still while you thread your needle.
 Sew a running stitch down either side of the join securing the bow in the middle, its OK if you sew right through to the other side as this will be hidden with the middle section.
 Take your middle section and place over the middle of the bow, turn the bow over and lay it flat on the table.
 Take the bottom edge of the middle section and fold inwards to the centre of the bow......
 Then take the top edge of the middle and do the same so that its neatly tucked in (as above) make sure your needle is threaded before you do this as you will need to hold the bow in place while you sew.
 Sew a running stitch along the joining edge.
 Now your bow is securely fastened in place, we need to add the hanging tab.
 Cut your ribbon to 18cm (or whatever length you'd like) and fold it in half placing the ends together, pattern sides facing up and stitch in place.
 Stitch the ribbon loop to the back of your ribbon.
 Now take the bow tails and overlap slightly at an angle (as above) and stitch together.
 Make sure they are secure.
 Stitch the bow tails to the back of the bow covering the ribbon loop with a running stitch again.....
 .......this leaves the back of your bow lovely and neat. Turn your bow over and......
 .....et Voila a pretty Christmas bow to go on your tree. You could also add an embellishment to your bow. I made a second set and added buttons.
 So if you take your bow middle section and sew a button exactly in the middle.
 Which will look like this.
 You can add a little detail to your bow.
 I have muddled through a morning at work with a piercingly sore throat today (without moaning too much). But now I'm armed with throat spray and Strepsils I thought it was time to tidy my studio. It looks soooo much better now, everything is back where it should be, rather than just all over the place (I call it organised chaos). The cosmetic pouches in the photo above were finished earlier in the week but its been so dark on an afternoon that I haven't been able to photograph them properly for my website. Fingers crossed Saturday morning is bright and photo friendly :D
 On Saturday my friend Andrea and I travelled to Birmingham to have a browse round the Festive Gift Fair at the NEC (which was not that good to be honest but I'll get to that bit in a minute). When we arrived these chaps were walking around the main entrance, as in the next exhibition hall there was a Memorabilia show.
 But I have to say that the high light of my day was meeting the man himself!!
 Comment number 18: earthlyjewels YEY!!!! Congratulations. Your stars will be in the post to you very soon, I hope they look lovely in your home.
 38 days until Christmas, not that far away now is it!
 Here is your template, make them as big or as small as you like, you could even make a variety of sizes.
 Materials you will need:
 Using your template draw your star shapes onto your chosen felt you will need two stars for each decoration. I used fabric markers which disappear after 24 hours but you could use whatever pen/chalk you like.
 Carefully cut out each star.
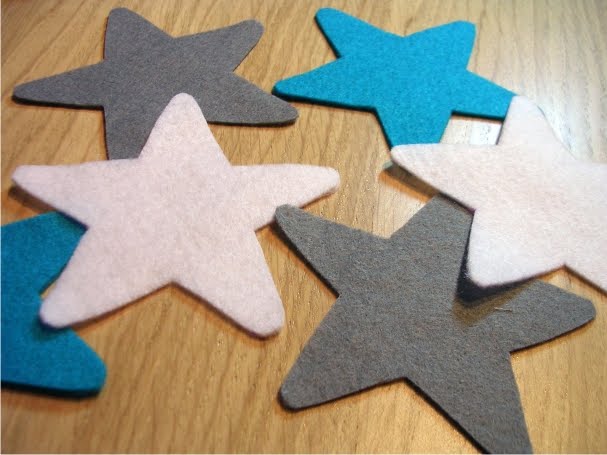 Now you have all your stars cut out, pair them up in two's. Take your chosen colour thread and double thread your needle. This will make the stitching detail stand out rather than single threaded.
 Starting at the bottom inverted point of your star stitch a running stitch all the way up to the top point.
 When you get to the top of the point turn your star over so you can see the back.
 And as you just slightly catch the felt feed the needle back down to the middle of the star, making sure that the thread is not visible on the front as you don't want to spoil that lovely stitching you have just done :)
 Once you have reached the middle make your way back out to one of the inverted points to start your next line.
 And as before stitch a running stitch line to the top of the point. When you have completed all the lines finish in the middle and tie off your thread.
 You will be left with two stars with lovely stitching detail. I like to put a pin at the top of each star so I know which way up they go when you sew them together.
 Cut your ribbon to 18cm (or whatever length you'd like) and fold it in half placing the ends together, pattern sides facing up and stitch in place.
 Stitch the ribbon loop to the back of the top point of one of your stars.
 Now with the good sides (lovely stitching) facing out pin together.
 Now using your thread but single threaded this time stitch all round the outside of the star again using a running stitch, make sure its quite close to the edge so that you create a cavity inside for stuffing.
 It will look something like this.....stop when you get to the last point of your star.
 Take a tiny bit of stuffing and poke gently into each of the points, stuff the centre generously. Stitch the last point and add stuffing to it, you can now add a little to the top point and hold in place as you continue to the top of the star where you started and tie off your thread.
 You will now have a little star that looks like this......
 You can add what ever detail you like you could cover the star in glitter or add a little rhinestone like I have. If you'd rather not stitch the lines onto the stars you could stick sequins or buttons on as embellishment. You could even add a smaller star in the middle out of jazzy Christmas fabric.
  24 spools of yummy festive ribbon